Branding on clothing is undeniably one of the most important aspects to any apparel brand's overall identity. It's vital for us as print shops to offer as many options for branding as possible so that we can continue to accept orders that call for such. One item in particular that is popular amongst apparel brands is the constructed hat.
Because of their shape, constructed hats are difficult to decorate, as they do not lay flat when DTG printing, screen printing, or even heat pressing. However, the Face Mask Kit's Top Plates allow for the last option to be possible! Enter in: DTG transfers. As outlined in our Direct to Film series, YOU can make heat transfers with your DTG printer. And for this project, that is what we will be using to add branding to the side of an embroidered constructed hat.
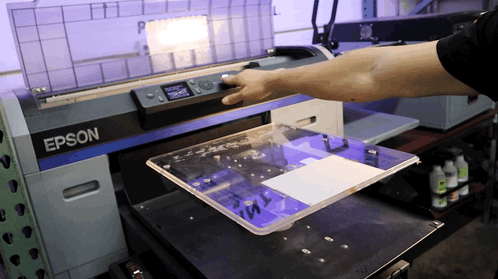
To learn the entire process of how to print DTG transfers with your DTG printer, click here!
Once you have your DTG transfers ready to go, it's time to load the apparel on to the Face Mask Platen!
Loading the Hat on the Face Mask Platen
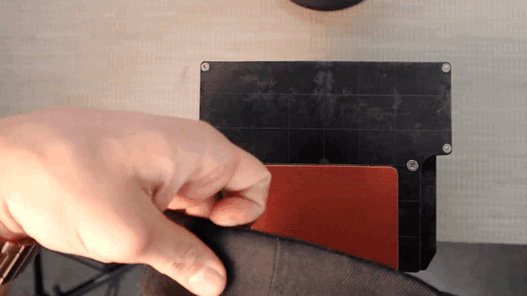
- Place the Face Mask platen on the Setup Station with the 3x4 Top Plate installed.
- Find the side the branding needs to go on and tuck the hat's sweatband around and over the top of the Top Plate and pull the hat taught so that it lays flat on the Top Plate's surface.
KEY TIP: Use the corner of where the hat panels meet the back straps of the hat as a guide against the Top Plate's corners to ensure your hat is laying straight. This will also hep get a good, flat hold when you put the Hoop in place. - Take the corresponding 3x4 Hoop and place it over the Top Plate to hold the hat in place.
- Change out your heat press's standard base for the Heat Press Adaptor included in the Face Mask Kit by simply unlocking and removing the standard base and replacing it with the Adaptor.
- Remove the loaded Face Mask Platen from the Setup Station and on to the Heat Press Adaptor.
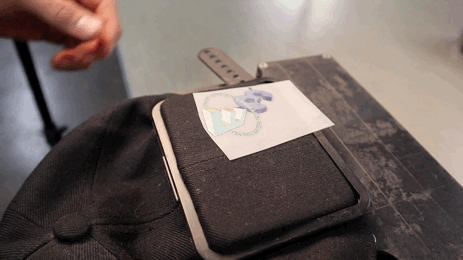
- Place your DTG transfer in the intended print area and heat press it according to your heat press and transfer film's suggested time and temperature settings. We set our heat press at 300F and pressed it for 30 seconds.
- After heat pressing, remove the Face Mask Platen from the Heat Press Adaptor and replace it on to the Setup Station.
- Peel off the transfer film in one fluid motion and unload the hat by removing the 3x4 Hoop.
And that's all, folks! You have successfully branded a constructed hat with your own DTG transfers using the Face Mask Kit for Heat Press!
From here, you can now print batches of transfers for client orders and heat press them in no time!
If you'd like a glimpse at how DTG transfers will benefit your print on demand production system, click here!
Products Used in this Project:
Want to See More of These Products in Action? Schedule a Demo Session with Us!
Are You Signed Up for our Newsletter? Subscribe HERE for a Special Discount!
-------