As we all know in this industry, time is precious, and wasting it means valuable productivity is lost. But, what if we told you that using Direct to Film to print on demand helps you save all of the above?! With DTF, instead of having to go through the printing process every time you need to fulfill an order, you can just print once and be done! Thus, saving time, money, and supplies!
For this project, we are using left chest transfers to show you how print on demand and DTF are a match made in print shop Heaven! Keep reading and we'll lay it all out for you.
Before we get started, you must first know how to use your DTG printer to make DTF transfers. You can find our entire breakdown of that whole process here.
Getting the Artwork Print-Ready
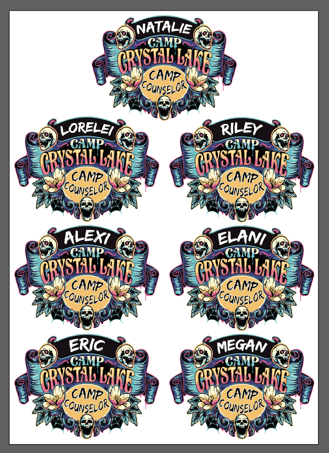
The most important step for using DTF with print on demand is ensuring your artwork is laid out in the most efficient way possible for the most output per film. This step takes place after the design phase is completed, but before exporting the artwork to then be opened in Garment Creator. To achieve this, there will be a lot of trying different positions for each individual artwork in your chosen digital art program. The point is fitting as many as possible on to the canvas.
- Once your artwork design is finalized, open a new blank canvas in your digital art program.
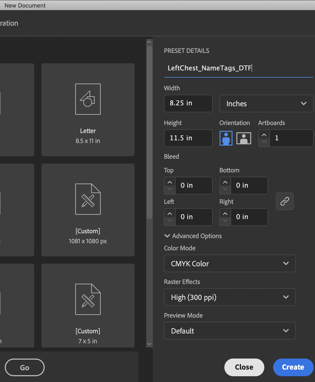
- Take the measurements of your transfer film sheet and input those as the canvas size.
Example: The transfer film we use is 8.25in W x 11.5in H, so in Adobe Illustrator, our new art board will be the same. - Copy & Paste your finalized artwork on to the new canvas and fit as many as possible within the canvas bounds.
KEY TIP: You can rotate each artwork to fit more on the canvas. Remember that you will be cutting these out by hand, so placing artworks close together or at odd angles is completely acceptable.
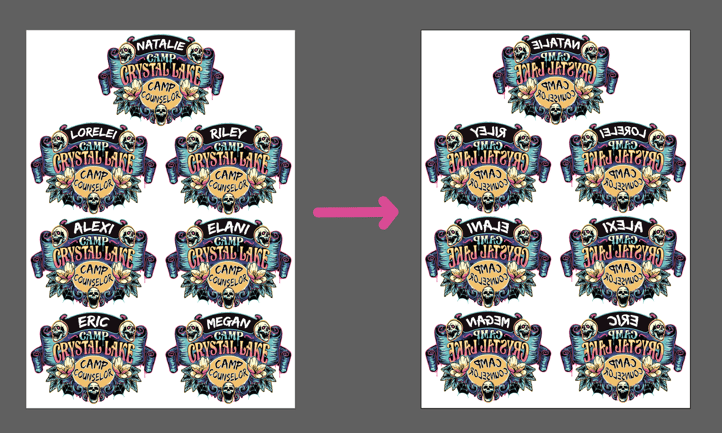
- Once you have laid out as many of the artworks on to the canvas as possible, do not forget to mirror the entire canvas to ensure it prints out in the correct orientation once opened in Garment Creator.
Now that your artwork is completely print ready, it's time to export it and open it up in Garment Creator for printing!
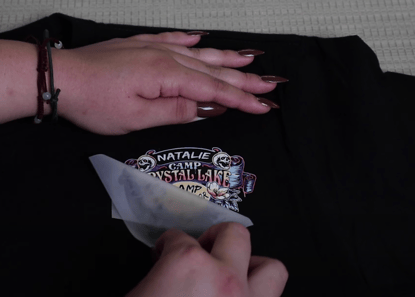
Once you have followed all the steps on how to make a DTF transfer and your transfers are cut out and ready to be pressed, place any of the transfers that you do not need yet in a cool, dry place.
And voila! That's all there is to it! The next time an order for that design comes in, all you have to do is pull the transfer, heat press it, and off the apparel goes to its happy new home!
Now that you know how print on demand is made more efficient and lucrative with DTF, let's get into why it's an excellent choice for apparel printing and decorating, regardless of your print shop's production method!
-------