The question that comes around most when discussing DTF is on its efficiency. And simply put, the answer is YES, it is a highly efficient production method. Not only can it save you time and money in regards to the print process, but it also opens up a whole world of products to offer in your shop!
To best represent the versatility and value of DTF, we tested it out on three different frequently-requested, yet difficult to print, products to put our money where our mouths are, and show you exactly what we mean!
The Red Backpack
Backpacks are popular request for orders for various reasons; promotional products, family gatherings, back-to-school, you name it! When it comes to apparel decorating, however, backpacks come with a few hefty setbacks.
- Pretreat is an important step in the DTG process, but in our experience as apparel printers, we have found that the color red (along with several others) does not pretreat well due to the discoloration it causes. Therefore, this backpack could not be pretreated.
- Even if you chose to skip the pretreating stage, backpacks have a lot of seams and zippers that do not allow for it to lay flat enough to ensure a quality print on either a DTG t-shirt platen or a screen print one.
- If you still chose to try and DTG or screen print on a backpack regardless of the issues above, the time and energy spent trying to troubleshoot ways around those problems results in an unnecessary loss in valuable productivity.
All of these points can be resolved with DTF, right? In theory, yes. However, you may be already thinking about how many backpacks have plastic zippers on them, and therefore should not exposed to pressure under high heat, such as what is necessary to apply a DTF transfer. But fear not, friend! We have the solution for you. In this project, we used our Face Mask Kit for Heat Press to isolate the area on which we are placing the transfer (the front pocket of the backpack) to ensure all zippers remain out of the way when pressing.
To use the Face Mask Kit for Heat Press with a DTF transfer:
- Remove the standard t-shirt platen base from your heat press and replace with the Heat Press Adaptor that comes included in the Kit.
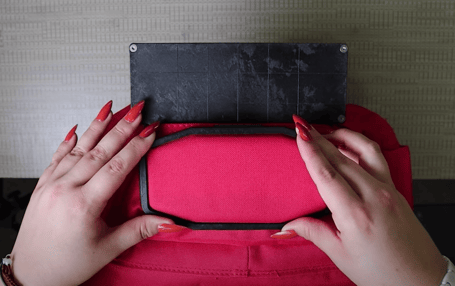
- Place the Face Mask Platen with the 3x6 Top Plate on the Setup Station (included in the Kit) and load the backpack by sliding the open backpack pocket over top of the Top Plate.
KEY TIP: You can use the Top Plate with or without the corresponding hoop! In this project, we are using it to hold the backpack in place, but for bulkier items or thicker fabrics, the apparel can be loaded directly on to the platen while already on the Heat Press Adaptor for use of the Top Plate's benefit of creating an isolated, raised print surface. - Remove the loaded Face Mask Platen from the Setup Station and place on to the Heat Press Adaptor.
- Place the transfer in the desired location and tape down with heat tape if desired.
- Heat press the transfer and backpack according to your heat press's suggested time and temperature settings.
The settings we used are 300F for 30 seconds. - After pressing, remove the backpack from the Face Mask Platen and let cool, then peel off the transfer film.
Now the backpack is done without a hitch!
The Gray Pencil Pouch
Just like red, gray is another color that discolors with pretreat. And pencil pouches are an extremely popular choice for promotional products, school-wide giveaways, custom gifts, and more. So, it's important to know how to decorate them in a way that is both efficient and cost-effective.
As displayed in our break down of using DTF for print on demand, DTF is a very time and supply-effective way for production of large or custom orders, as the printing process only needs to be done once. This means that when producing an order with a lot of units, like orders for pencil pouches typically have, DTF is the way to go.
It's easy as 1, 2, 3!
- Place the DTF transfer in the intended placement on the pencil pouch.
- Place the pencil pouch on the 3x6 Top Plate of the Face Mask Kit, with or without the Hoop, to isolate and elevate your print surface.
- Heat press the transfer and pencil pouch and peel the transfer film when the pouch has cooled.
The entire process takes less than five minutes! Meaning you can fulfill those bulk orders in a breeze, while saving time, money, and supplies too!
The Water-Resistant Nylon Hat
Another scenario in which DTF is an excellent solution for apparel decorating is when the item has a special coating on it preventing it from coming into contact with other chemicals such as pretreat (DTG) or spray adhesive (screen print). For example, the hat we are using for this project has a water and sweat-resistant coating to keep the wearer cool and dry while exercising, hiking, etc. And trust us, if there's one thing we know a lot about, it's decorating hats.
To decorate this hat, we are using the Captain Platen Kit for Heat Press, which ensures the transfer will be placed exactly where you want it without having to compromise the special treatment of the hat.
- Place the Captain Platen for Heat Press on the Setup Station (included in the Kit) and lock it in place by pushing in the two handles on either side of the platen. Ensure the locking bar is pushed away from you.
- Slide the hat's bill under the front bar and pull the hat back over top of the Crescent Top Plate, tuck any sweatbands and tags underneath the Top Plate.
- Straighten out the hat bill to align with the sides of the platen and push the front edge of the bill back until it is aligned with the top of the platen.
- Pull the front panel of the hat as flat as possible and engage the locking bar by pulling it backwards (toward you) and sliding it into place. The front panel should feel secure and lay flat.
- Unlock the Captain's side handles and remove it from the Setup Station and place it on the Heat Press Adaptor.
- Lay the DTF transfer in its intended placement and tape down if desired.
- Heat press the transfer and hat.
- After pressing, replace the Captain Platen back on to the Setup Station and peel off the transfer film once it is cool to the touch.
And there you have it! All three items have been saved by Direct to Film!

With DTF, you'll never have to turn down an order again. This means a much more productive print shop for you, and a whole lot more printing potential unlocked!
Items used in this project: