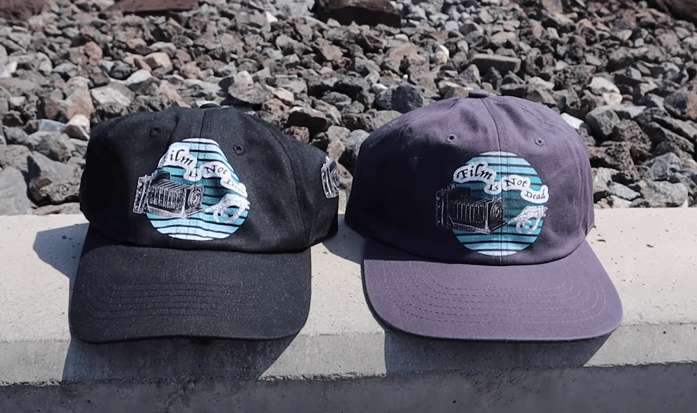
What if we told you a kit exists for Direct to Garment printing that allows you to print on a hat efficiently, functionally, and with ease-- one Kit to rule them all! Well, it does! And it goes by the name of the Captain Platen Kit Supreme.
The older sibling of our Captain Platen Kit Classic, this kit contains:
And to best demonstrate all the capabilities of both kits, in this post we will be outlining how YOU can print on ALL sides of a hat.
To start, let us explain what we mean when we say all sides of the hat. This includes the front panel to the top of the bill, under the bill, and on the sides of the hat. And before we get started, we must first pretreat our hats to prepare for printing.
Pretreating the Hat
Pretreat is an essential step to DTG printing, as it ensures the DTG ink will stick to the fabric and improves the washability of the garment. To learn more about why pretreat matters, check out this video.
- To pretreat the hat, thoroughly spray all areas on which you will be printing.
- We use Firebird FBX-VIVID DTG Pretreatment for Light Color Garments and Firebird FBX-100 DTG Pretreatment for Dark Color Garments for our pretreating. These can be found at most DTG supply stores.
- Once the hat is pretreated, let it dry for at least one hour prior to printing.
Printing the Front Panel of the Hat
-
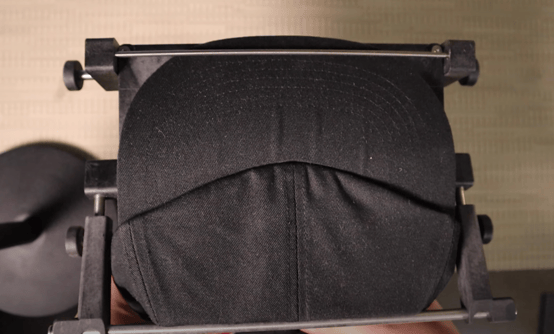
Loading the Hat on to the Captain Platen
- Place the Captain Platen on the Setup Station (included in the Kit) with the Crescent Top Plate closest to you, and lock it in place by pushing in the two knobs on either side of the platen. Ensure the locking bar is pushed away from you.
- Slide the hat's bill under the front bar and pull the hat back over top of the Crescent Top Plate, tuck any sweatbands and tags underneath the Top Plate.
- Straighten out the hat bill to align with the sides of the platen and push the front edge of the bill back until it is aligned with the top of the platen.
- Pull the front panel of the hat as flat as possible and engage the locking bar by pulling it backwards (toward you) and sliding it into place. The front panel should feel secure and lay flat.
- Unlock the Captain's side handles and remove it from the Setup Station by pulling the platen's two side knobs outward and place it on the Master Adaptor on your DTG printer with the Crescent Top Plate closest to you. Lock it in place by pushing in those same side knobs.
KEY TIP: Always do a platen height check prior to printing whenever you switch to a new platen. The Captain Platen will usually be set at 2 on the Epson F2100, but always check to ensure the highest quality print possible. - Open your artwork in Garment Creator (Epson) or Graphics Lab (Brother) and set according to desired print settings.
- Send artwork to the printer and print.
- To print an artwork that goes from the top of the front panel all the way to the brim, the entire process of loading and printing remains the same.
- After printing, remove the Captain Platen from the Master Adaptor by unlocking the side knobs and replace it back on to the Setup Station.
- Push the front bar forward until the hat's bill is no longer obstructed and disengage the locking bar by pulling it toward you and pushing it up and over the hat.
- Pull the hat's sweatbands out from under the Crescent Top Plate and remove the hat from the platen.
KEY TIP: The platen's Top Plate may leave creases or indentations around the printed area. The WILL come out during the first wash. However, if you need to remove it sooner, i.e. for a sample, wet a paper towel with water and gently press the paper towel into the creases. They will fall out naturally. - To cure the print, you can let it rest under the hot plate of your heat press (do not press the hat, just hover it over the hat), or let it air dry for at least 24 hours before wearing to ensure the print dries down completely.
Printing the Underbill of the Hat
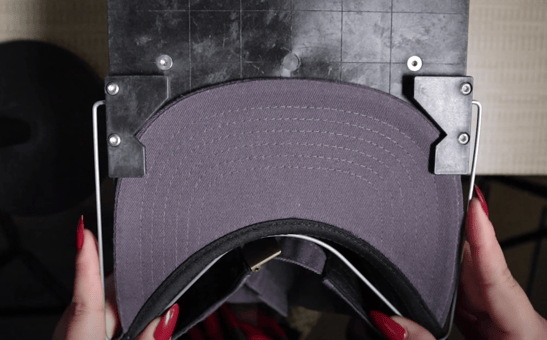
- Loading the Hat on the Underbill Platen
- Place the Underbill Platen on the Setup Station with the platen's notches closest to you and push the wire frame away from you.
- Slide the hat with the underbill facing up into the notches on either side of the platen, ensure the side edges of the underbill are aligned with the sides of the platen.
- Loosely tuck the body of the hat (the part hanging off the platen) into itself and engage the wire frame by pulling it toward you to rest inside the hat and hold it in place.
- Remove the Underbill Platen from the Setup Station and place it on the Master Adaptor with the platen's notches closest to you.
- Set up your artwork and print settings in your DTG printer's included software and print.
- After printing, remove the Underbill platen from the Master Adaptor and replace on to the Setup Station.
- Disengage the wire frame by pushing it away from you and pull the hat brim out from the notches.
- Cure the hat by laying it under the hot plate of your heat press and hovering the hot plate over the print. Ensure the underbill is facing up.
Printing the Side of the Hat
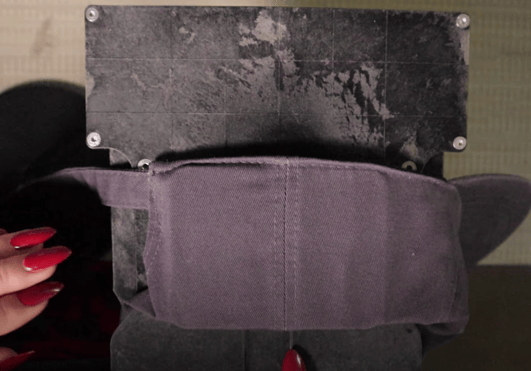
- Loading the Side Panel Platen + Tucker
- Place the Side Panel Platen on the Setup Station with the Top Plate closest to you.
- With the hat upside down and the bill pointing to either the left or right, tuck the hat's sweatbands around and under the top of the Top Plate and align the seam that connects the side panels with the ditch on the Top Plate.
- Pull the tucked hat panel to be as flat as possible and use your Tucker to tuck the rest of the hat under the bottom edge of the Top Plate. You may either leave the Tucker in Place for extra hold, or remove it once you get a tight, flat surface on the side panels.
- Remove the Side Panel Platen from the Setup Station and place it on to the Master Adaptor with the Top Plate closest to you.
- Set up your artwork and print settings in your DTG printer's included software and print.
- After printing, remove the Side Panel Platen from the Master Adaptor and replace it on the Setup Station.
- Remove the Tucker and gently pull the hat from the Top Plate.
- Cure the hat by laying it under the hot plate of your heat press and hovering the hot plate over the print.
And that's all, folks! Now you know how to print on all sides of an unconstructed hat easily and effectively-- no special rigs needed!
Interested in a Production-Friendly version of the Captain Platen Kit? Check Out the Captain Platen Kit Production!
Products Featured in This Project:
Want to See More of These Products in Action? Schedule a Demo Session with Us!
Are You Signed Up for our Newsletter? Subscribe HERE for a Special Discount!
-------