Baby onesies are a historically tricky item to DTG print on due to their small size and complicated finishings that can cause all sorts of production issues. However, much like a baby with a pacifier and a warm bottle, the 7x8 Platen + Locking Hoop are here to ease all your whining and strife!
The Standard DTG Platen vs. the 7x8 Platen + Locking Hoop
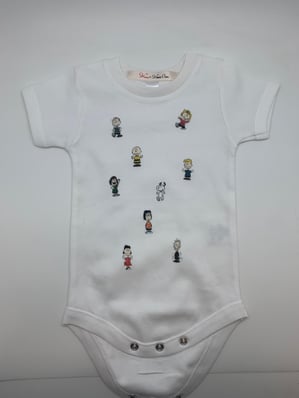
Let's start with the basics; why is this a valuable process in the first place? Well, if you've never tried to DTG print a baby onesie, you're lucky. The process can be quite... frustrating, to say the least. The platen that comes with your machine measures in at 14x16, which obviously is going to be too big to fit a tiny baby onesie. So, you are forced to improvise with DIY rigs such as taping the onesie to the platen, clipping parts of it away, even lowering the platen height all the way down to the bottom just to get the platen with the onesie loaded on it to successfully print without a height sensor issue! And as you can imagine, all of these steps are just not conducive to keeping production as efficient as possible. Especially when you receive an order for an entire batch of onesies, of which you will have to repeat this painstaking process for every single one. It would make more sense (and put your mind at ease!) to have a platen specifically designed with onesies in mind, so that all you have to do is load, lock, and print. In a matter of seconds, you'll be printing onesies in no time! This is the value of the 7x8 Platen + Locking Hoop, which leads to a high quality end product that stays consistent every time, thus leading to less stress for you, and more satisfaction for your customer.

The Benefits
We'll keep it simple here: onesies just are not possible to print profitably and efficiently without the Ultimate Print Shop Package. The three main points of value the 7x8 Platen + Locking Hoop add to your print shop are: 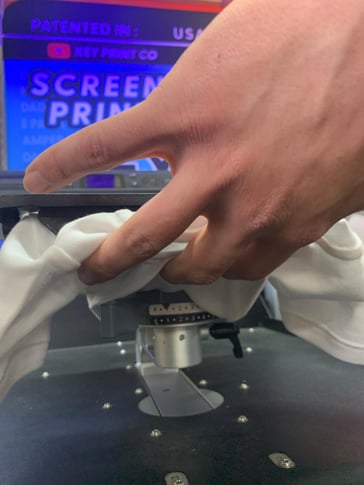
- Keep seams and snaps out of the way to avoid height sensor issues
- Prevent warping of the apparel and stretched out prints with the onesie fitting comfortably on the 7x8 Platen
- No more wasting valuable production time by trying to load a onesie on the 14x16 platen; prints remain consistent and high-quality every time, no tape needed
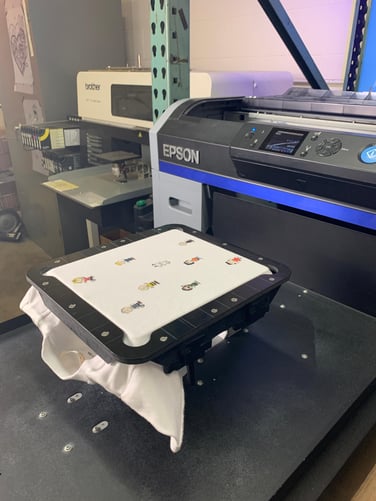
How to Load and Print with the 7x8 Platen + Locking Hoop
- Place the Master Adaptor (included in the Ultimate Print Shop Package) on to your DTG printer
- Install the 7x8 Platen by using the loading tracks on the Master Adaptor to lock the platen in place
- Thread the onesie over the 7x8 Platen and smooth out any folds or puckers
- Place the Locking Hoop around the loaded platen and secure it down by pushing in the locks on either side of the Hoop
- You are ready to print!
- After printing, simply unlock the Hoop, remove the onesie, and cure it with your heat press
The whole process takes less than a minute to complete, and in comparison to several minutes with the standard platen that comes with your machine, it is easy to see how much more efficient orders will be produced with the 7x8 Platen + Locking Hoop.
But don't just take our word for it! Check out the video above to see the goods in action! And to catch a glimpse at what more the Ultimate Print Shop Package can do, check out our Hoodie platen, the best platen for ladies tees, and a denim jacket we printed with this same 7x8 Platen + Locking Hoop!
-------
Learn more about the Ultimate Print Shop Package here!
Shop the Ultimate Print Shop Package!
Want to See More of These Products in Action? Schedule a Demo Session with Us!
Are You Signed Up for our Newsletter? Subscribe HERE for a Special Discount!